Out of Retirement – Again
by Brent Mathson
The autumn months were fast approaching, and I knew that it was crucial for me to get going on the restoration project if it was going to be painted before the weather turned too cold. At my request, Van loaded all of the parts he had stored in his shop onto his trailer and delivered them to my shop. After a careful inspection, I determined that all of the parts would be suitable to use on the Allis tractor’s restoration. Of course they couldn’t be perfect, even with the skills I had acquired in my fifty years of bodywork experience. The parts were all original which aged them at over eighty years old, and there was no way I could make them look like new. However, they would be presentable if they were sandblasted, primed, and painted. The important factor was that they had been a part of the tractor when my grandpa rode that tractor, and they would be a part of that tractor when his great-great-grandkids rode that tractor. I bought several bags of blasting sand and spent the next couple of weeks sandblasting the parts.
At this time I would like to emphasize the fact that sandblasting car parts, or tractor parts, or any kind of parts for that matter, was not my favorite restoration activity. With my do-it-yourself equipment, the process was slow, tedious, and dirty. Working for hours with heavy gloves, a mask, face shield, and hot clothing is pretty tough on a seventy year old man. I set up tarps to collect the sand once it had been blasted so that I could reuse it again and again. I learned by trial and error that before the sand could be reused, it needed to be spread out on tarps under the sun so that it was completely dry. Otherwise it tended to clog up the blasting unit which resulted in a frustrating disassembly procedure followed by an equally frustrating reassembly procedure. By working daily four hour shifts, the pile of orange parts was at last transformed into a pile of gray parts.
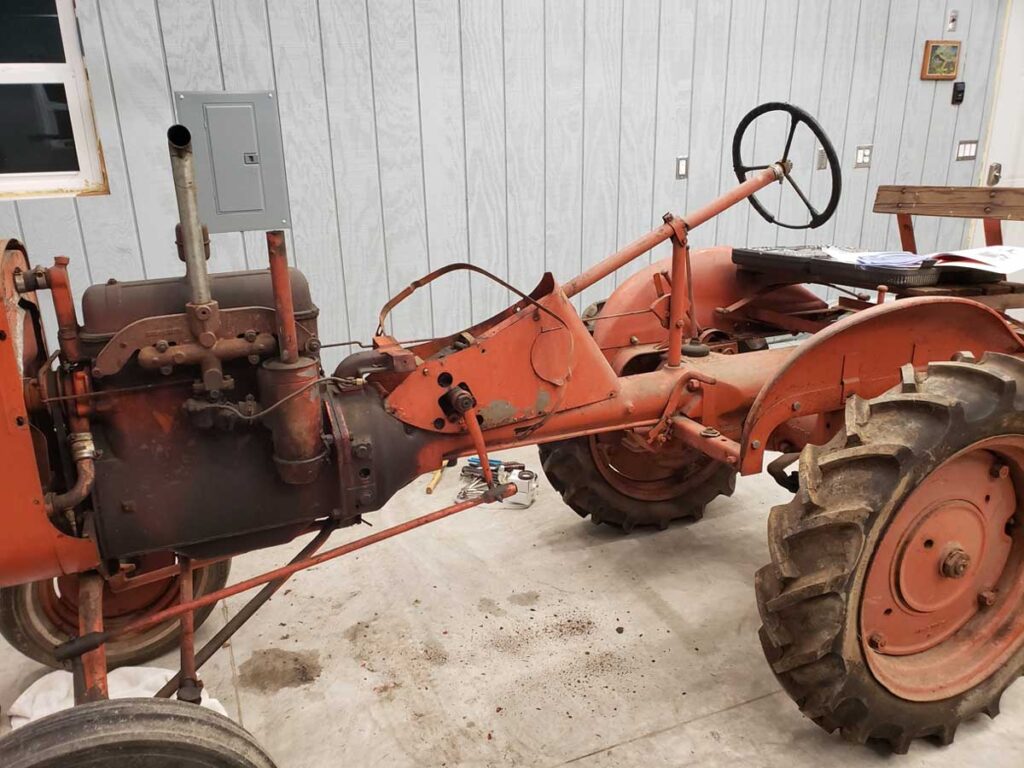
I knew that I still needed to get parts that were still attached to the tractor like the axle and the members that held that axle to the tractor, so I made a trip to Van’s shop and with his help, the axle as well as the engine were removed. I was anxious to get the parts needed for an engine rebuild ordered, so we started disassembling the engine. I was pleasantly surprised when the valve cover was removed because the top of the head seemed to be in pristine condition. The rocker-shaft and arms were as good as the day I had installed them forty years prior. There was some anxiety as the head was unbolted because I anticipated rusty worn cylinders which shouldn’t have really caused anxiety because they were going to be replaced anyway. To my complete surprise, the cylinders appeared perfect. In addition, there was not one crack in the webbing between the cylinders which was a very common occurrence with the Allis Chalmers B engines. There was no ridge on the cylinders, and a check with my measuring instruments revealed that each cylinder had about ten thousandths wear. The manual recommended replacement when wear exceeded twelve thousandths, so a decision would have to be made.
Being that a complete restoration was being done to the tractor, I naturally wanted the engine to perform like new, so both Van and I were inclined to replace the cylinder liners in spite of the fact that they were marginally acceptable. Most of the later model B Allis engines had a bore diameter of 4.375 inches. Van’s tractor was a very early model with 4.250 cylinder bores. Liners for the larger bore were very easy to find but finding them for the smaller bore was quite a different matter. Try as I might, I could not locate them on the internet. Finally, I contacted Steiner Tractor Parts to enlist their aid because they had come through for me before. They informed me that the smaller liners were very scarce but that they would find them for me if I wanted them. They also informed me that the cost could be very high. That information, along with the fact that this particular Allis would have very limited use, settled the decision as to whether or not to replace the cylinder liners. We decided that the little Allis would be very happy with her original liners. Meanwhile, back at our engine inspection procedure, main bearing caps were removed to check the crankshaft journals. Visually, they appeared as fine as the day they were reground forty years ago. Plastigauge was used to check clearances which measured at two-thousandths of an inch for each journal. The main journals were nearly perfect and after a similar test, the rod journals proved to be just as good. The pistons were removed, and they along with their corresponding rings underwent a rigorous examination. They all passed the test with flying colors. The anticipated high cost for an engine rebuild was thankfully quickly declining. At this point, the only required expense was a gasket set for about seventy bucks. Unfortunately, the good news stopped when the camshaft was inspected.
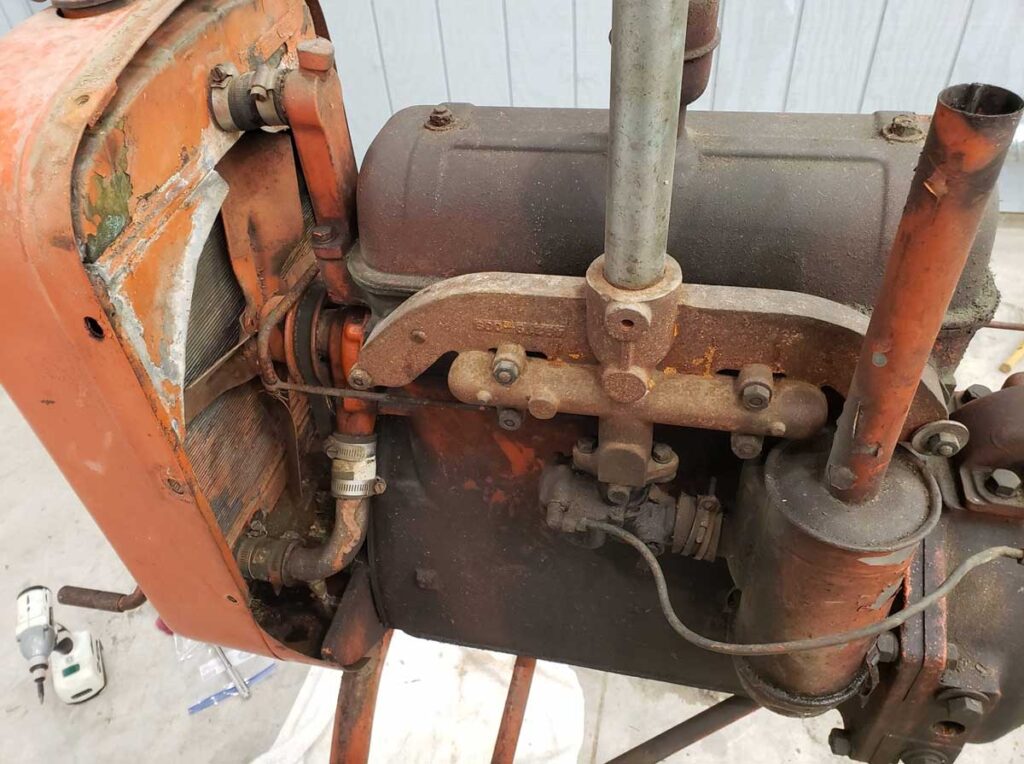
Of the engines that I had rebuilt prior to the Allis engine, there was only one that had required new camshaft bearings. Being that I didn’t have the equipment or the experience to change these particular bearings, I had farmed the work out to a machine shop. When I removed the camshaft and lifters from the Allis engine, I was relieved to find that both the lifters and the cam were in useable condition. The bearings were quite another matter, and I knew that if they were not replaced the engine would soon fail. The question was whether I would take the engine to a machine shop or attempt the repair myself. I decided that I would add cam bearing installation to my list of accomplishments.
From my internet research, I was very familiar with the bearing replacement procedure. The original bearing were knocked out and the new bearings were knocked in using extreme care to insure that the oil holes in the bearings aligned perfectly with the oil holes in the engine block. The question was how do you go about knocking the “old” out and the “new” in? It was apparent that a special tool would be needed to perform the “knocking” procedure, so I turned one out on my metal lathe. With this tool, I was able to very easily knock out the old bearings. The tricky and crucial part was installing the new bearings. Marks were precisely placed on the bearings and the holes in the block where they would reside. By perfectly aligning the marks and carefully driving the bearings into place with my installation tool, the job was completed with professional results. With the bottom half of the engine completed, the only job remaining was to recondition the head.
I took the head to my shop and completely disassembled it, placing all the parts in a special storage jig I had constructed to insure that each part went into its original position in the head. I had a valve seat grinding tool that I had used on small engines and luckily it could be expanded to grind the seats on the Allis head. The valves were cleaned from all carbon deposits and then tested in the guides. The fit was very good. I didn’t have the equipment to grind the valves so I hand lapped them to the seats. Afterwards they were given the leak test and every valve prevented leakage. The completed head was set aside until it could be installed on the engine. With most of the precision engine work completed, it was time to go do some more blasting.
Once the front axle and its associated parts had been cleaned of rust and old paint, most of the parts were in good shape and ready for some new paint. I had planned on using automobile primer and paint in order to give the little Allis the best appearance possible, so I headed for the auto parts store. The manager pulled out his book and found the correct Allis Chalmers color and then quoted me some prices. A gallon of paint with its required thinner and hardener would set me back three hundred and fifty bucks. The primer would be another hundred. I almost fell off the stool that I was sitting on. I informed the manager that show-quality paint probably wasn’t needed on an eighty year old tractor. He suggested that I use implement paint like they used in the old days. I got on the internet and found a gallon of genuine Allis Chalmers implement paint for thirty dollars. The Rustoleum primer cost me another thirty bucks. I was ready to do some painting.
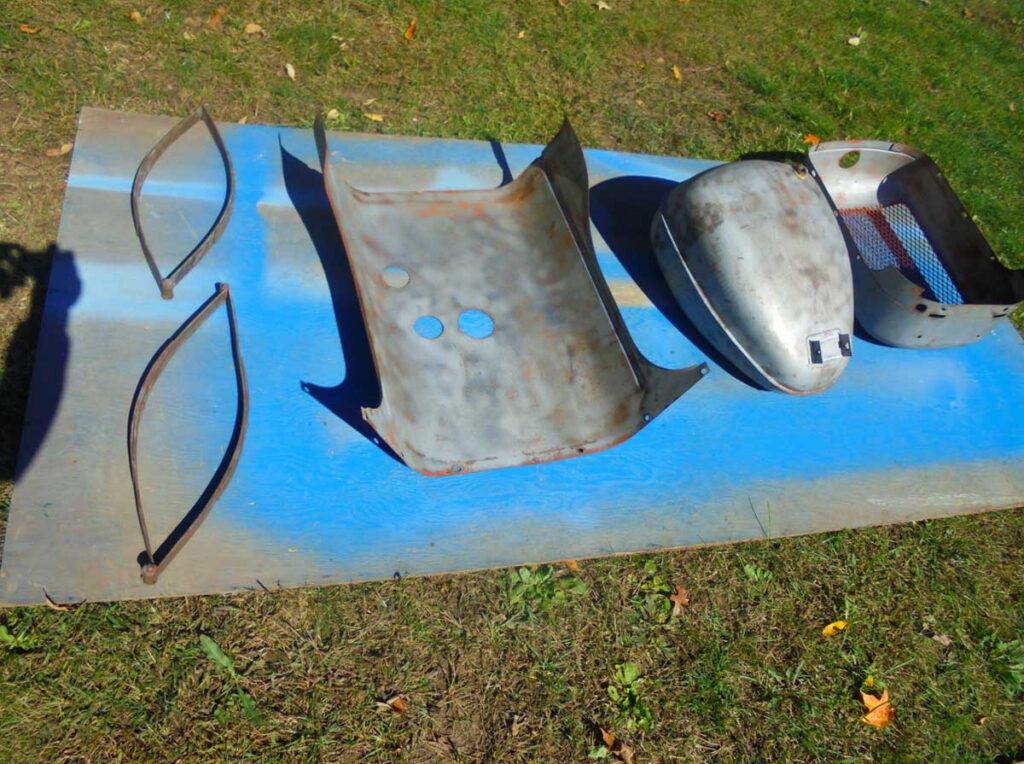
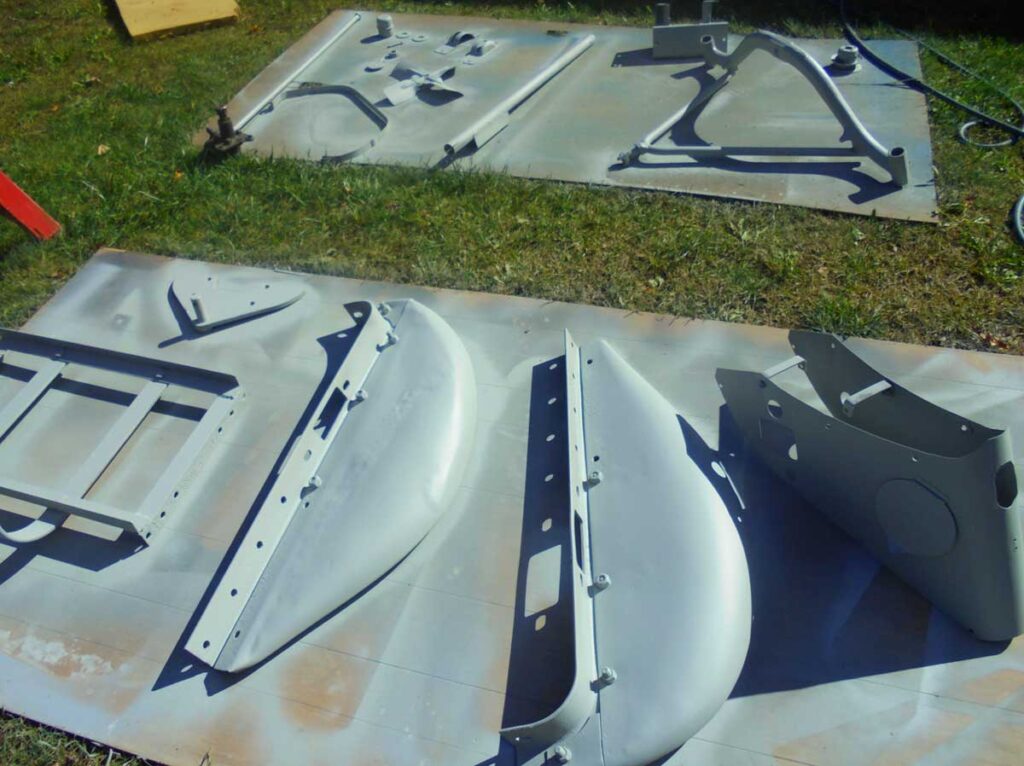
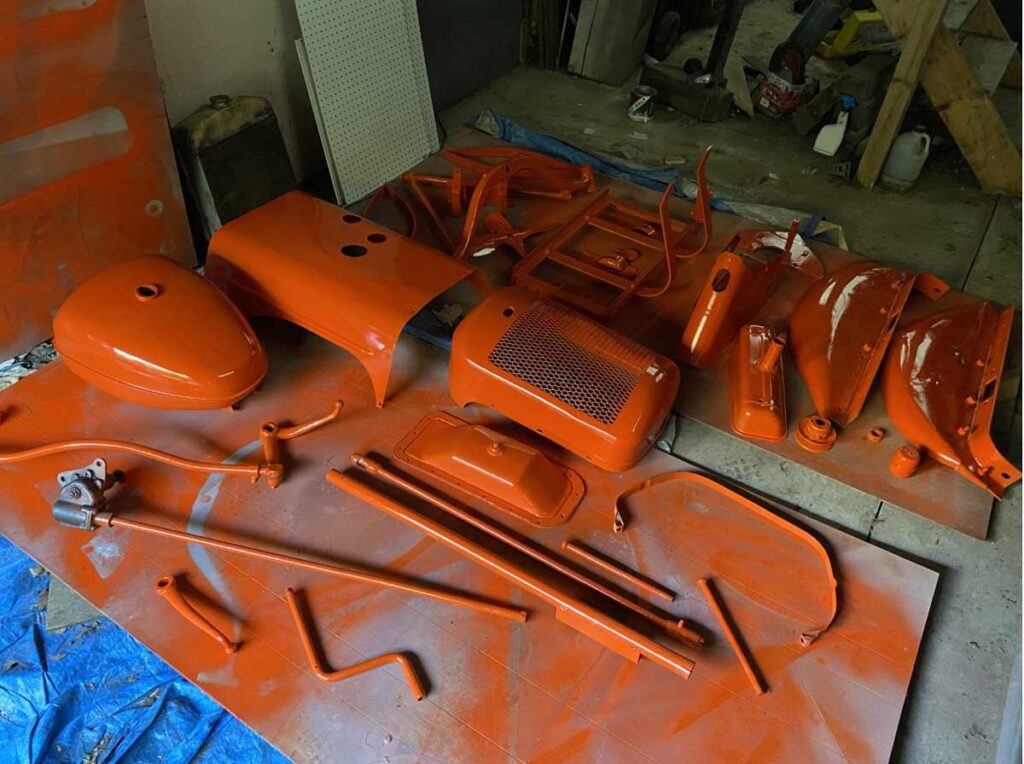
When a week of warm weather was forecast towards the end of September, I was ready to shoot some paint. Parts were arranged on sheets of plywood in the field by my shop, and I gave them two heavy coats of primer. The next day was spent lightly sanding the primer in preparation for the final orange coat. That coat was lovingly applied the following day. I was very impressed with the way that the implement paint went on. I sprayed a light coat to prevent runs and then started shooting some serious coats. I was amazed that the paint wouldn’t run and soon the dull surfaces started to shine. When I was finished, the results far exceeded my expectations. Unlike some of my previous auto paint jobs, there was no orange peel. The implement enamel produced excellent results without the hassle involved with the expensive car paints. While the warm weather persisted, I went to Van’s shop and the tractor engine block and body were painted with similar excellent results. A day later, I was in my shop congratulating myself on the fine looking tractor that was evolving. Grandpa Lee would be proud, but then I think that Grandpa twisted my head until I spotted it – the steering wheel.
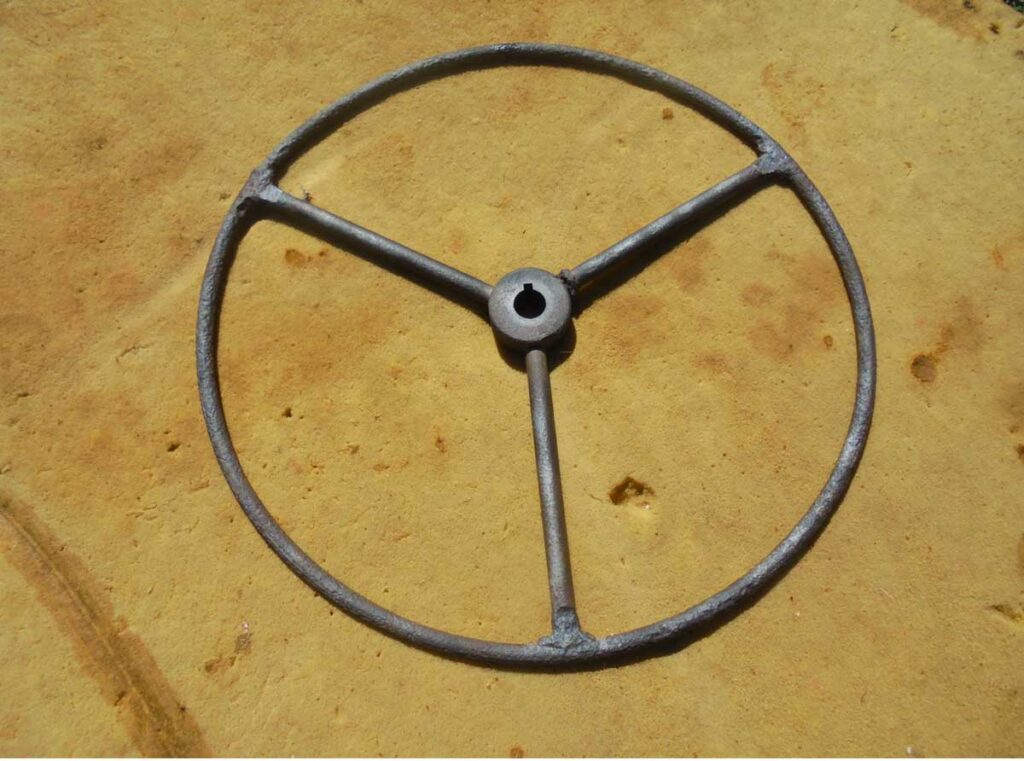
The steering wheel had always been a questionable part of the Allis Chalmers model B tractor. It was in truly deplorable shape. The outer rim had chunks of rubber missing while cracks ran deep in the remaining rubber. Inside spokes, devoid of the protective rubber, were pitted with rust. Van had checked and found replacement steering wheels on the internet for thirty-five dollars plus shipping. After talking to him, I got on my computer and found those same steering wheels. They were guaranteed to fit perfectly. I was about to hit the “Buy” button when a vision entered my mind of Grandpa gripping the steering wheel of his tractor as he maneuvered it around his garden. Call me a sentimental old fool but I couldn’t shake that picture from my mind. At that moment I declared that my grandkids were going to be gripping the same steering wheel that their great-great-grandfather had gripped. Time to go to work again – Grandpa.
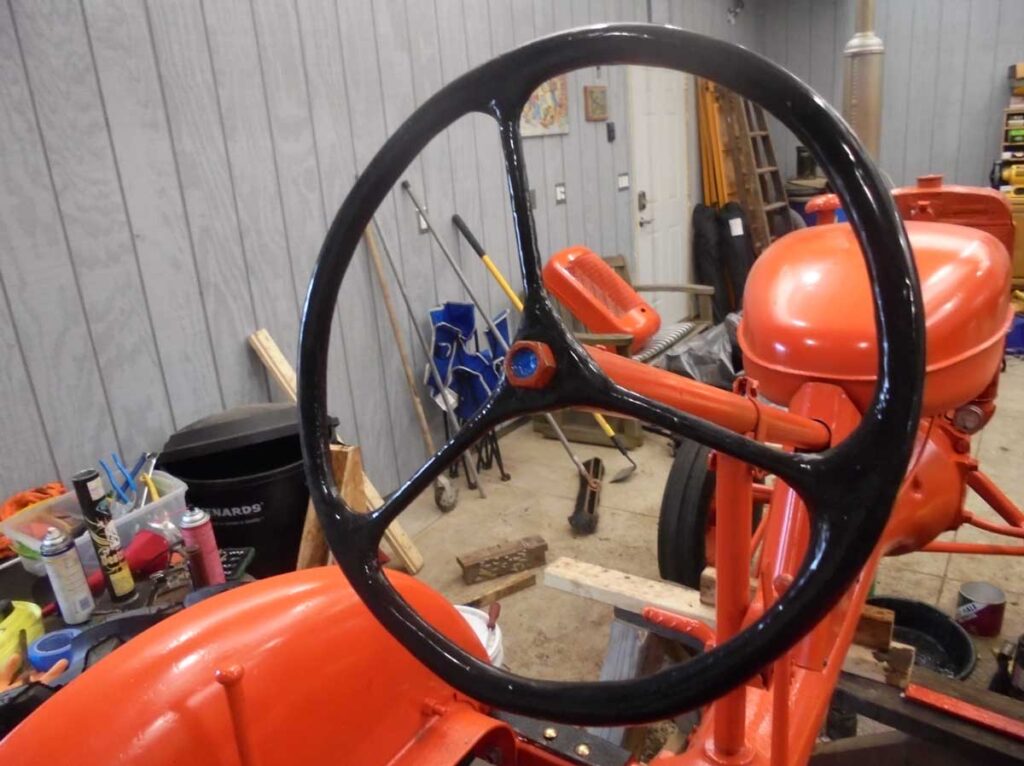
After contemplating several options to restore the steering wheel, I selected the one that seemed to offer the best result and got started. The first step was to take a hammer and unceremoniously knock all of the hardened cracked rubber off the outer rim. Now I was left with a steel rim connected to a center section by three rusty spokes. A wire wheel removed the rust and then it was time to build up the outer rim to its former dimensions. Menards sold a product that was used to replace and restore rotted wood in buildings. The material was a plastic that wouldn’t shrink or expand and was impervious to weather. It was similar to auto body putty but had a longer working time and was designed to be applied in thick layers. I thought that it would be perfect for my intended use and proceeded to apply it to the outer rim of the steering wheel. It went on pretty rough but after some rasping and sanding, it looked acceptable. The final step was to apply a heavy coat of black Flex-Seal brush-on rubber over the entire wheel. When it had cured, I had a steering wheel that looked like new, and it only cost me three hours of my time and forty dollars in materials. When I left my shop, I turned off the lights and said, “that one’s for you, Grandpa.”
Before I mounted the steering column and refurbished steering wheel to the tractor, I figured that it was time to take care of the wheels and tires. As I stated previously, Van had decided to mount all new tires on the tractor of the correct size. He had ordered the best tires he could find online, and the purchase had set him back nearly a thousand dollars. That act alone told me that he was pretty serious about his great-grandfather’s tractor. A fine set of tires deserved to be mounted on some fine rims and that would prove to be a major problem.
I had taken all of the mounted tires to a tire shop to have the tires taken off the rims. The rims would be taken to my shop, sandblasted, primed, and painted. Once they were the fine rims that this tractor deserved, they would be returned to the tire shop, and Van’s thousand dollar tires would be put on. When the call came from the tire shop that the rims were ready, I went to pick them up. When I saw them, I was met with some major disappointment. The rims looked like the eighty years old rims that they were, so a plan was needed to restore them to their youth. Both rear rims would require some serious sandblasting and then a minor brazing job to repair a couple of cracks and a few pinholes. With some heavy primer and paint they should almost sparkle. One front wheel was in about the same condition as the rear rims and would receive similar treatment. The other front wheel was a disaster and presented another major problem. The rim was beyond repair. Numerous cracks and rust holes were too large to braze and would make properly mounting a new tire impossible. I considered buying new wheels but I could not find wheels that were riveted rather than bolted to the bearing housing. If new wheels were bought, new spindles and bearing housings would also be needed. Besides being costly, the new setup would not be correct on a 1938 tractor. I needed a better solution. My good friend, Scott Swanson, solved my problem.
I mentioned Scott in a previous section where he provided a like-new bumper for Dad’s Chevy truck. Scott is the most knowledgeable farmer that I have ever known. Besides farming, Scott taught a high school Ag class and also served as a field man for a major dairy. Scott was a successful farmer because he maintained his old farm equipment rather than buying new. To keep his machinery running, he had acquired a vast stockpile of used parts. In this stockpile, he happened to have a wheel with the exact size rim that I needed. I could cut the rims off the old tractor wheel and Scott’s new wheel and then weld the good rim on the center section of the old wheel. That’s exactly what I did, and the problem was solved.
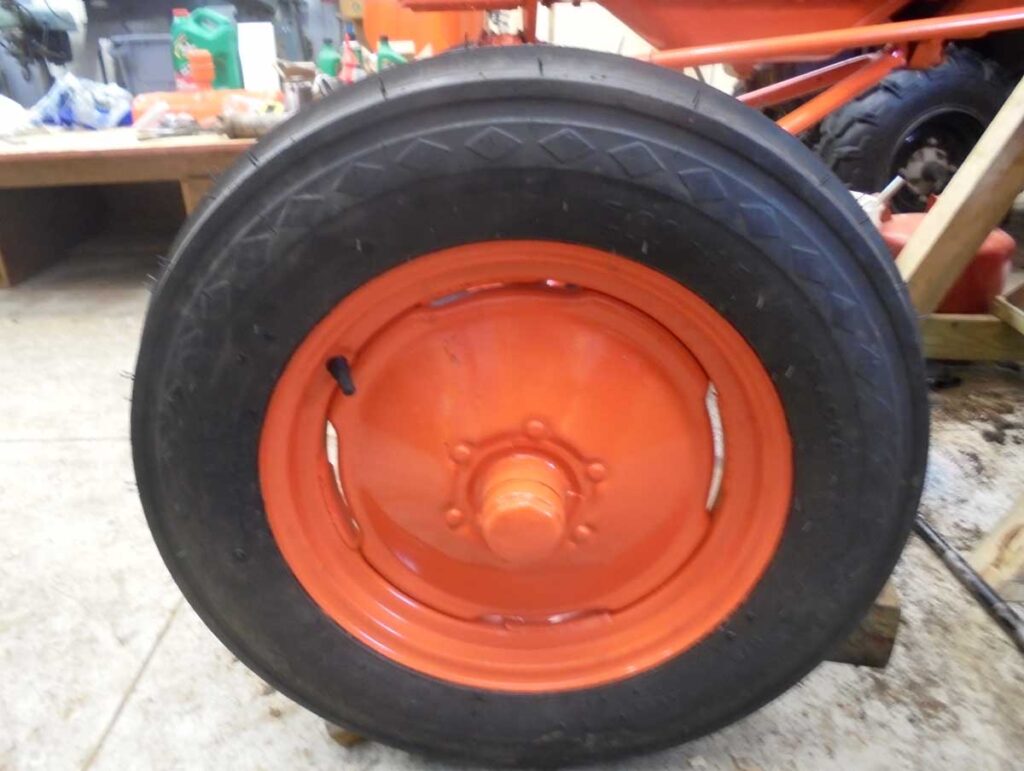
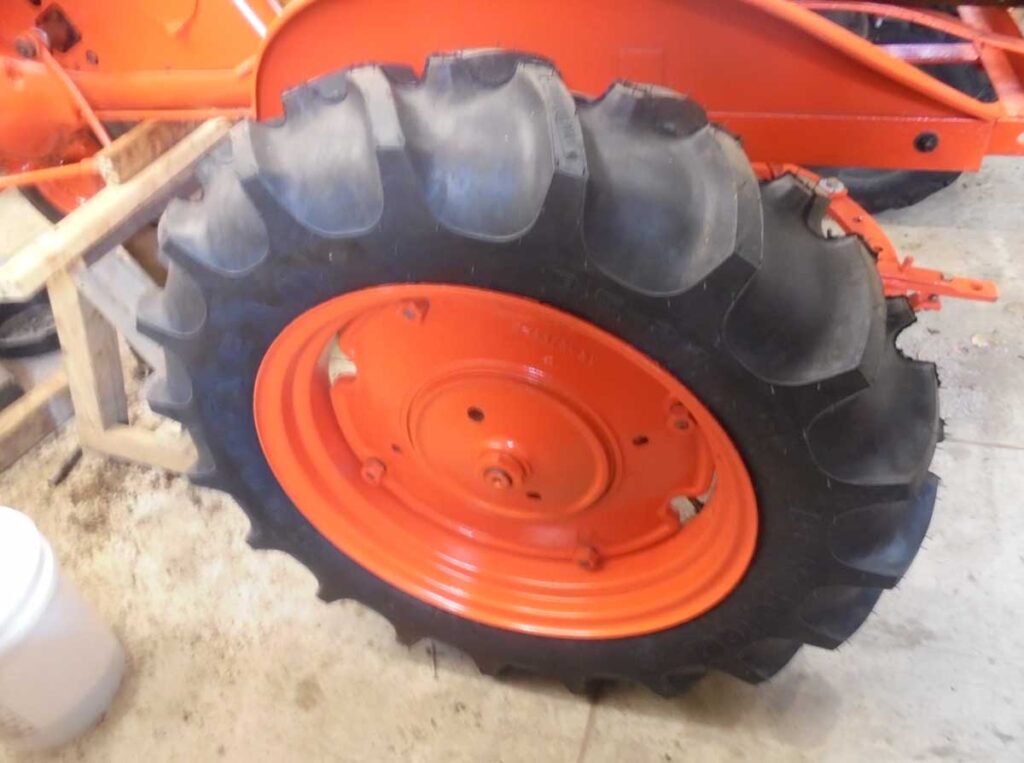
The rear rims and front wheels were sandblasted and then the defects were repaired. Once the primer and paint had been sprayed, they were very presentable. I would never be ashamed to drive them to a tractor show. They were returned to the tire dealer to have the tires put on, and the dealer’s approval of my work made it all worthwhile. While I waited for the tires to be installed, I decided to tackle a task that I had long been avoiding – a brake job.
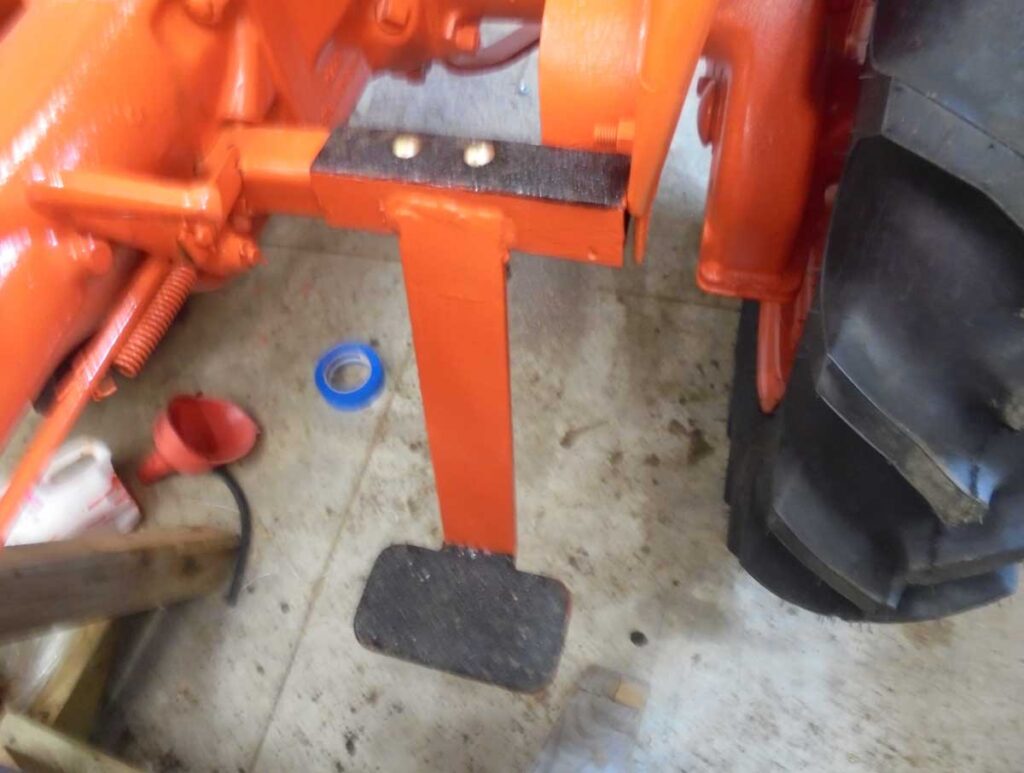
The 1938 Allis Chalmers model B used hand brakes, that when applied, would tighten brake bands around steel drums. Of course they weren’t nearly as effective as a modern braking system, but they worked quite well to stop a little Allis. The present brakes on Van’s Allis couldn’t stop a toy tractor. I had watched videos demonstrating the procedure to replace the brake bands. It was a simple procedure made almost impossible by the fact that over time, rust has a tendency to weld steel parts together. The pins securing the brake bands to the cast iron housing had to be removed to get the bands out, and the videos that I watched required a heating torch, a large hammer with an equally large punch, and hours of hammering. Just watching that video had pushed the brake job to the back of my list of things to do.
Being that the jobs on that list had mostly been crossed off, I got a big hammer and went to work. Just a few blows knocked two of the pins out, and I guessed that I had vastly overrated the difficulty of the task. The remaining two pins wiped that notion from my mind. Just as I was about to fire up my torch in desperation, one of the pins budged and then moved a little more with each hammer blow. When it popped out, my success led me to deliver even heavier blows to the lone remaining pin, and it too popped out. With a heavy bar, I was able to pry out both rusted brake bands. An hour later, the large mouse nests surrounding both brake drums had been removed, and I went to work reconditioning the drums. Sanding belts were snaked around the drums and pressure was applied while I turned the rear axle. In time the rust was removed, and the sanding belts were replaced by new brake bands. Another job was crossed off the list.
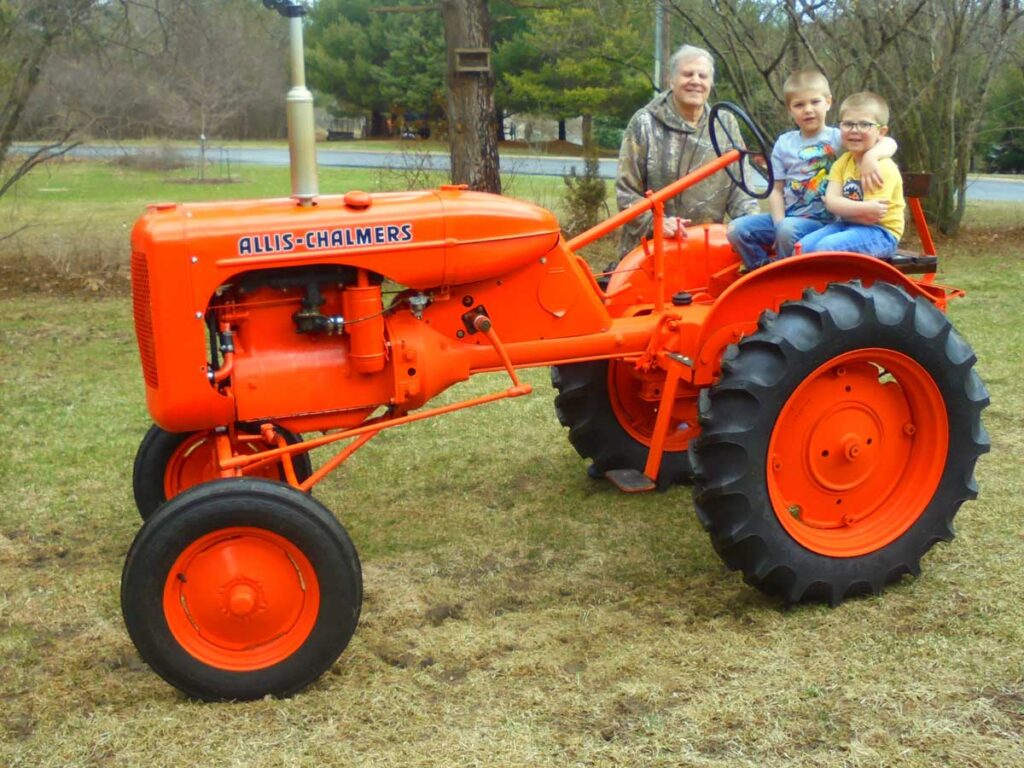
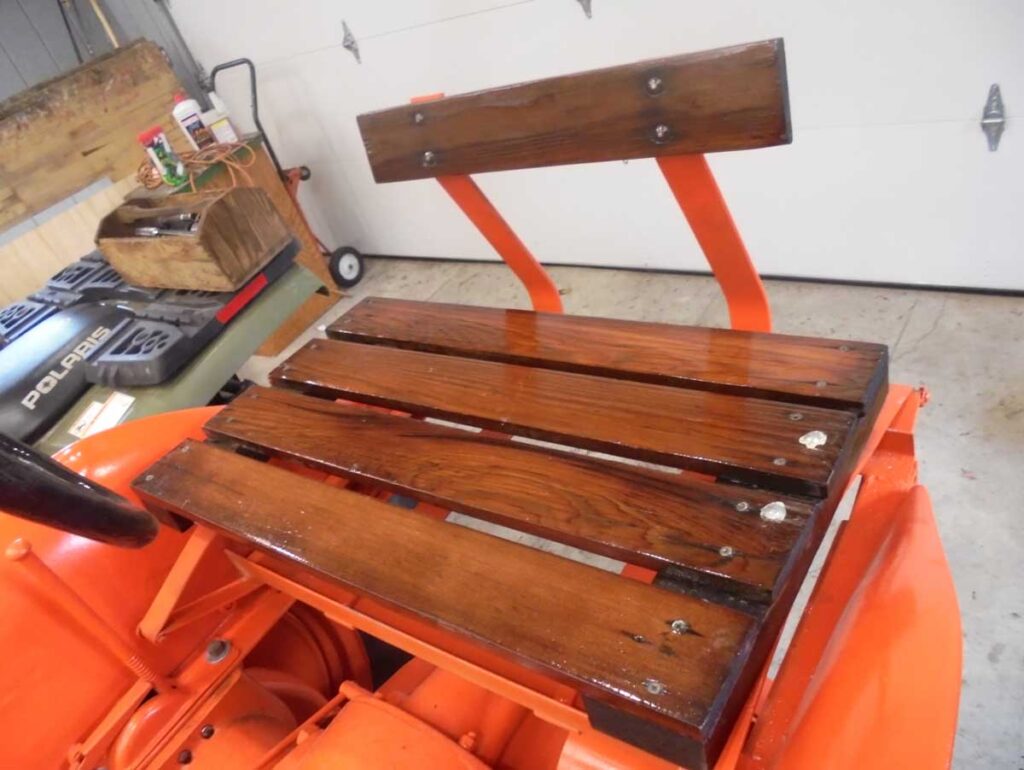
As the tractor restoration was nearing completion, I looked back over that list to relive some of my experiences. Parts such as the carburetor, the magneto, the steering gear, and the water pump had all been rebuilt and were functioning properly. The excessive wear in the front axle and spindles had been eliminated. All of the engine work was completed but could not be evaluated until the engine was actually running. The radiator had been reconditioned and tested for leaks. All of the tractor’s steel had been sanded, primed and painted, and then bolted back together. Grandpa’s steering wheel looked as good as new mounted to the column. The seat that grandpa had bounced around his garden on, had been repaired and varnished and mounted with new bolts so that it looked better than it ever had. The braking system functioned as well as it had the day it rolled out of the factory. I smiled when I noticed that there were just two items on the list that didn’t have a line drawn through them – mount the wheels and start the tractor. Very soon it would be determined if my final restoration project would be a success.
Leave a Reply